Particles.js Tutorial – Create particle effect with javascript
In this tutorial, I’m going to talk about particles.js. A javascript library that let you create a dynamic particle effect on your webpage. You can customize the size, speed, movement behaviour and much more with particles.js. Here is the demo page of particles.js that allows you to try out various configuration and see how it actually works.
Setup
Once you have done played with the demo, it’s time for the implementation. Let’s start with downloading the latest release from github and import it to your HTML page using script tag.
Next create a configuration json file. This is the where you can customize the particle option such as size, density, movement, color etc. I’m going to use the basic setting provided on the github which should be a good start.
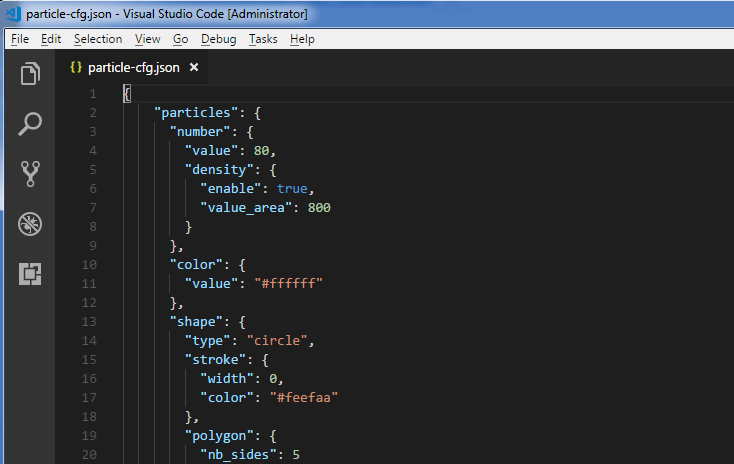
I’ll also change the color a little bit since the page background is white.
{
  "particles": {
    "number": {
      "value": 80,
      "density": {
        "enable": true,
        "value_area": 800
      }
    },
    "color": {
      "value": "#fdefaa"
    },
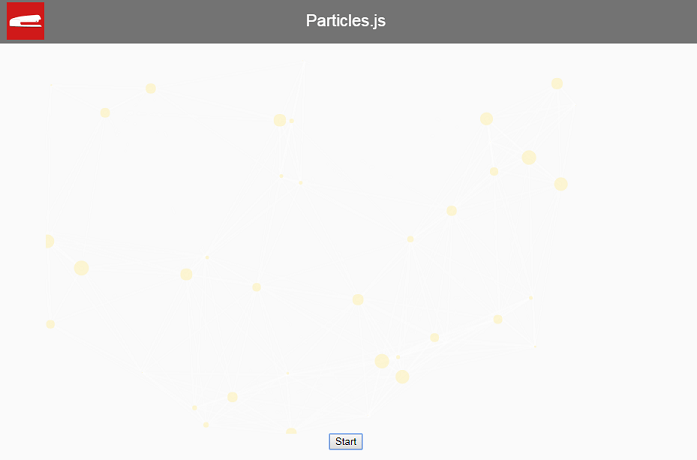
Next create a div element that you want to use as particle wrapper with appropriate width and height. I’ll also create a button to start the particle effect when clicked.
<div id="particle-div"></div>
<button id="particle-button">Start</button>
#particle-div {
    margin: 0 auto;
    width:800px;
    height:500px;
}
In the click event, we can start particles.js using load method and provide the ID of the wrapper element we’ve just created, followed by the name of the configuration json file
$("#particle-button").click(function(){
          particlesJS.load('particle-div','particle-cfg.json');
      });
and that’s it you’ready to go. Let’s see how it works!
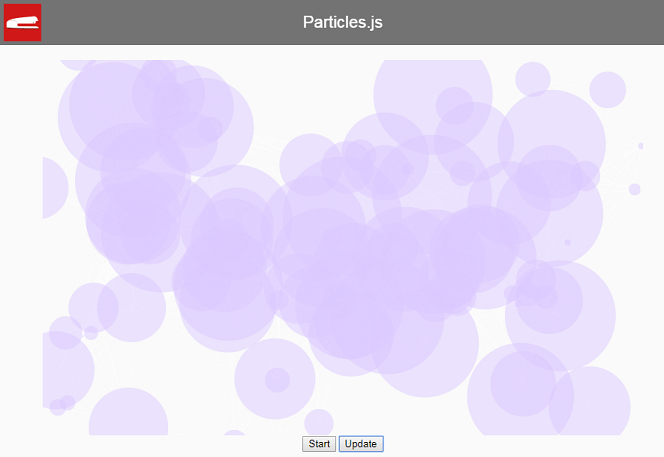
Change Option Dynamically
You can also make change to the particle option on the fly. Let’s create an update button.
<button id="update-button">Update</button>
Inside the click event handler, we can reference the particles.js object array and make change to the setting like this. You can see the full list of these setting on the github. When you’re done with the updates, call particle refresh method to pick up the change.
$("#update-button").click(function(){

        window.pJSDom[0].pJS.particles.number.value = 200;
        window.pJSDom[0].pJS.particles.color.value = "#dccaff";
        window.pJSDom[0].pJS.tmp.obj.size_value = 80;

        window.pJSDom[0].pJS.fn.particlesRefresh();

      });
And here is when you click the update button.
You can see them in action in video below:
So that’s conclude the quick tutorial about particles.js. Hope you enjoy it. Don’t forget to subscribe our Youtube Channel and Facebook for more interesting javascript library, cool CSS and other tutorials!
Source Code
<html>
  <head>
  <meta http-equiv="content-type" content="text/html; charset=UTF-8" />
  <script src="jquery-2.1.4.js"></script>
  <script src="particles.js"></script>
  <link rel="stylesheet" type="text/css" href="styles.css">
  </head>
  <body>
  <div id="navbar"><span>Particles.js</span></div>
  <div id="wrapper">
      <div id="particle-div"></div>
      <button id="particle-button">Start</button>
      <button id="update-button">Update</button>
  </div>

  <script>
      $("#particle-button").click(function(){
          particlesJS.load('particle-div','particle-cfg.json');
      });

      $("#update-button").click(function(){

        window.pJSDom[0].pJS.particles.number.value = 200;
        window.pJSDom[0].pJS.particles.color.value = "#dccaff";
        window.pJSDom[0].pJS.tmp.obj.size_value = 80;

        window.pJSDom[0].pJS.fn.particlesRefresh();

      });
  </script>
  </body>
</html>
#particle-div {
    margin: 0 auto;
    width:800px;
    height:500px;
}
It’s recommended a library upgrade from particles.js to the newer version tsParticles (https://github.com/matteobruni/tsparticles), it’s a continued version with bug fixes and new features